Estimated reading time: 4 minutes
In order to display visits and revenue data in the Verbolia dashboard, a Google Analytics 4 (GA4) authorization must be granted to Verbolia (if you are using GA4).
There are two ways to configure this authorization:
- Through the Master instance (recommended)
- Individually through each standalone instance
Configure GA4 through the Master instance (recommended) #
Using the Master instance allows centralized management of GA4 access across all attached instances, reducing repetitive configuration work and simplifying maintenance.
When a Google account is connected at the Master level:
- All attached instances automatically inherit the authorization by default
- A different GA4 property can still be selected for each instance if needed
- Multiple instances can also share the same GA4 property
Step 1: Connect a Google account #
- Open the Master instance settings
- Go to Analytics Management
- Click “Sign in with Google”
- Complete the Google authorization flow
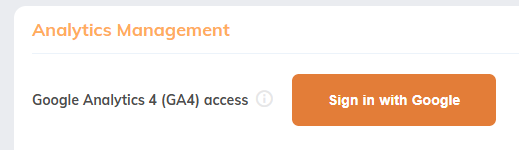
Once completed, attached instances without GA4 authorization (granted at the instance level) automatically inherit access from this account.
Step 2 : Configure GA4 properties #
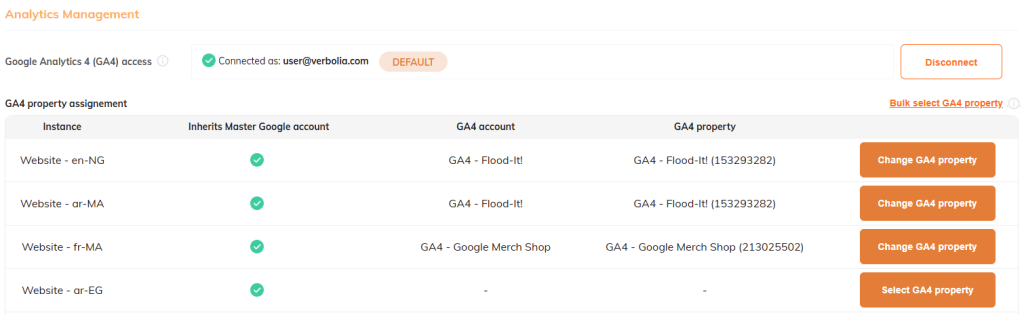
A summary table displays:
- All attached instances
- Whether they inherit the Master authorization
- The selected GA4 property for each instance
For each instance, you can:
- Select a specific GA4 property
- Change the assigned GA4 property later if needed
Bulk assignment of GA4 properties #
You can assign the same GA4 property to multiple instances using the bulk feature.
Clicking “Bulk select GA4 property” opens a modal where you can:
- Select one or more instances
- Choose the GA4 property to apply
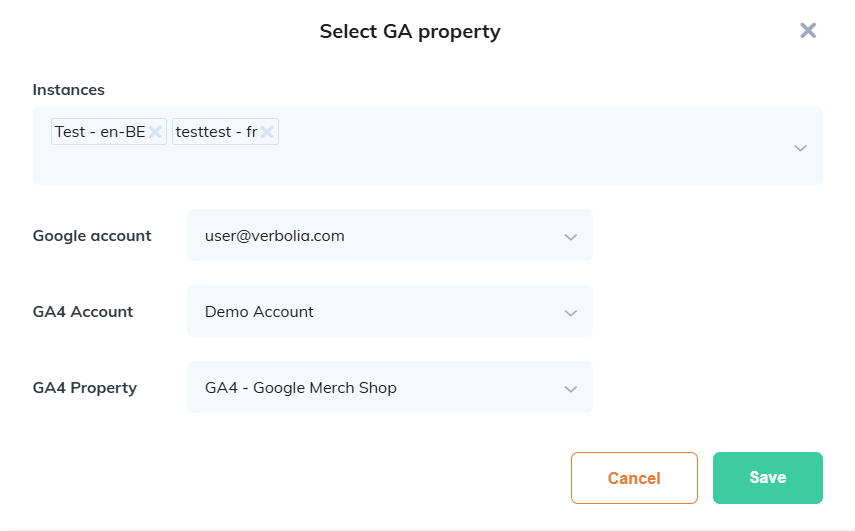
Once confirmed, the selected GA4 property is applied to all selected instances.
If some instances already have a GA4 property defined, this action will override the previously configured property for those instances.
Using multiple Google accounts #
If the Google account used for authorization does not have access to all required GA4 properties, another user can also grant access with a different Google account.
To do so:
- Click “Add Google Account”
- Complete the Google authorization flow
- Assign the new Google account to the desired instances

This allows different instances to use different Google accounts while still being managed from the Master instance.
When multiple Google accounts have been used to grant access, it is possible to change the assigned Google account directly from the table.
In the “Inherits Master Google account” column, a dropdown displays the currently assigned Google account (email). Clicking on it opens a list of all available Google accounts linked to the Master instance, allowing the user to switch the account for that instance.
Note :
When multiple Google accounts are configured, a default account can be defined. If a new instance is added later, it will automatically inherit from the default Google account. The GA4 account and property will still need to be selected.
Override the Master authorization for a specific instance #
Even when an instance inherits the Master authorization, it is still possible to configure GA4 independently for a specific instance.
The configuration status is always visible in the Data Analytics section as a small label, indicating whether the instance is using the Google account from master (Inherited Master instance settings) or a Google account specific to the instance (Custom setting).
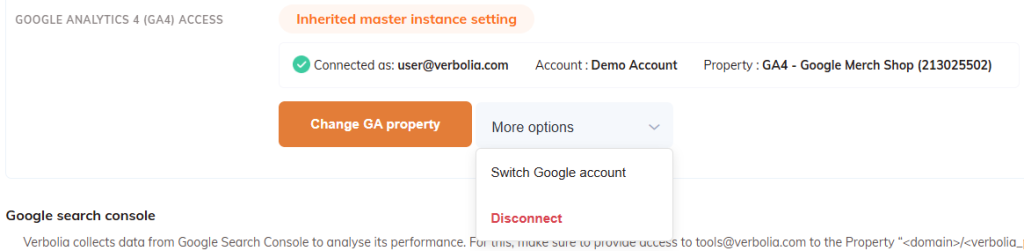
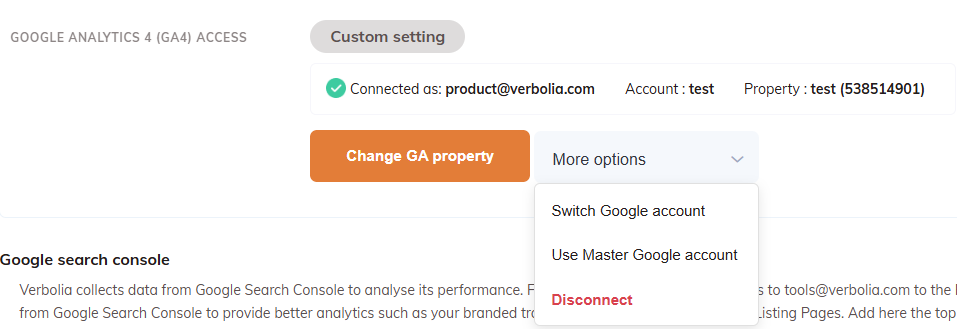
From the standalone instance settings, you can:
- Switch to another Google account
- Select a different GA4 property linked to the Master Google account
- Disconnect the inherited configuration
Configure GA4 through a standalone instance #
If you prefer, GA4 authorization can also be configured independently for each standalone instance.
Steps #
- Open the instance Settings
- Click “Sign in with Google”
- Complete the Google authorization flow
- Select the desired GA4 property
If you manage multiple standalone instances, this process must be repeated for each instance individually.